4. CAPTURING AN APPLICATION
4. CAPTURING AN APPLICATION4.1. How does it work?
4.1. How does it work?- Start PickMeApp
- Choose the desired applications from the list and check the box beside them.
- Click the Capture button in the middle bar :
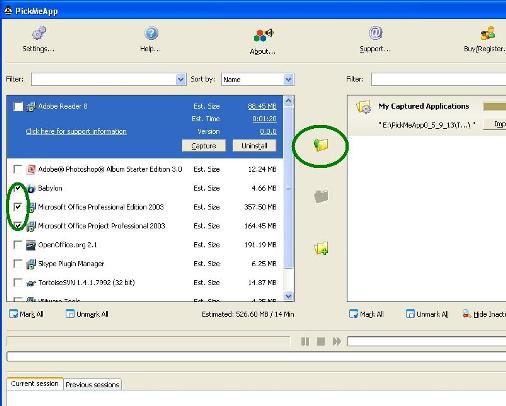
- Wait while the applications are being captured (as indicated in the progress bar).
- When the progress bar turns gray, the transferred applications have been saved in the default profile referenced to the folder TAPPS, located within the main PickMeApp folder.
4.2. Using the Installed Applications list (Left Panel)
4.2. Using the Installed Applications list (Left Panel)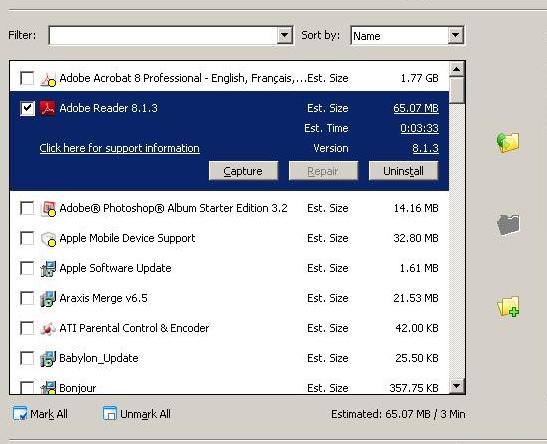
Using the Filter
- Start PickMeApp
- Type some characters from the application name in the filter input line, or choose one of the predefined filtering options*.
- Check the desired applications, or choose the “Mark All” option.
- Click the “Capture” and transfer your application to the default profile.
- During the capture, you can skip/pause an application transfer, using buttons at the progress bar.
- Please wait until the progress bar turns gray, and the “Capturing process finished” message appears.
- <captured> Shows only applications already captured in the selected profile.
- <not captured> Shows only applications not captured in the selected profile.
- <selected> Shows only previously marked applications.
- <clear> Cancels the previous filter, and causes the applications list to revert to the default state.
- <captured> To see applications captured in the current profile.
- <not captured> To select a new application to capture.
- <selected> To see a list of applications you chose to capture.
The Unmark All button
Capturing multiple applications
- Start PickMeApp.
- Using filters or manual selection, check each application to be captured.
- Click the Capture button, and transfer your applications to the default profile.
- During the capture, you can skip/pause an application transfer, using the buttons at the progress bar.
- The capture is complete when the progress bar turns gray, and the “Capturing process finished” message appears.
Using a destination profile
- Start PickMeApp.
- Click on the “Create new profile” button.
- Enter a unique profile name
- Type in the name of a destination path or browse for a unique destination path.
- Click the “OK” button
- Start PickMeApp.
- Choose one of the available profiles in the right panel, and click on the profile name.
- The chosen profile becomes the destination for applications captured.
Marking of installed applications
Installed applications on the list can be marked by a colored circle:
Yellow : the application is currently running
Green : the application is already captured in the current profile on the right panel
Blue : the application is already captured in one of non-active profiles on the right panel
Expanded Application entry
To learn more about an application, click on its name in the application list.
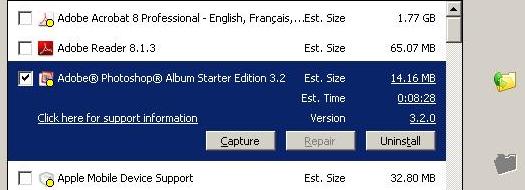
- Est. Size : Estimated size of the application package when captured.
- Est. Time : Estimated time taken for the capture of the application.
- Version : Version of the application, as provided by the application vendor.
- Support Info : Provides a link to detailed information about the application.
- Capture button : Starts capturing the application immediately
- Repair button : Repairs the application. Active only if the repair feature is available.
- Uninstall button : Uninstalls the application from your system *
4.3 Software Suites
4.3 Software SuitesA software suite is a collection of software programs bundled and installed together. The software programs share a similar domain and may have correlative features and functionality, or they may be completely different from one another. After the software suite setup is finished, it can be difficult to determine how those software programs are related and whether they are part of a suite.
Microsoft Office is a popular example. Microsoft bundles multiple software programs like Word (Word Processor), Excel (Spreadsheet), PowerPoint (Presentation Program) and Outlook (email client) into a software suite. Although each of these programs function differently, they are all considered productivity software.
Prior to this PickMeApp version, a software suite user had to manually locate all related software programs, capture them one by one and then recover them onto the target PC. Some of our app workarounds advised users on how to deal with their software suites.
With this Version 1.2. release, PickMeApp is able to identify related software programs as part of a software suite. It lists the software suite under “Installed Application List” alongside the other applications. The user can easily distinguish software suites by their names which starts with “@Suite@” and the bold title fonts. Users can also use the <suites>
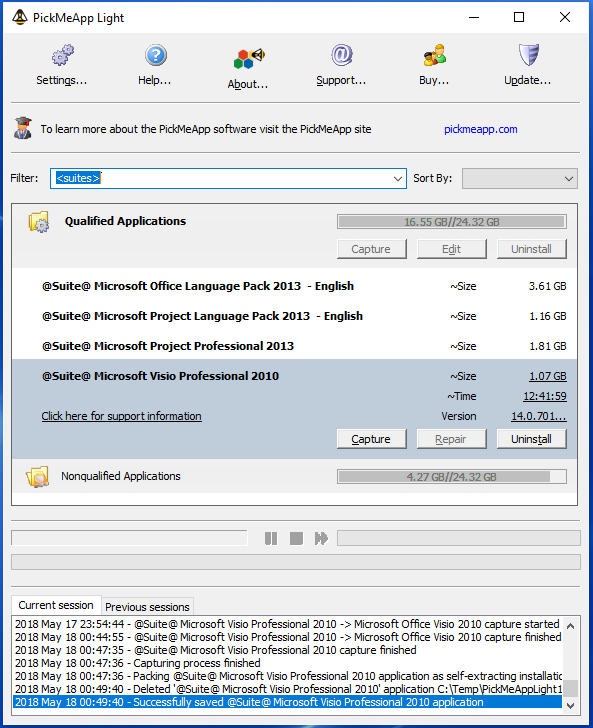
Software suites are capturable if all related applications are capturable ( Qualified Applications) . When a software suite is captured, PickMeApp takes all related applications and packages them as a single TAP file or as a single self-extracting executable setup (PickMeApp Light). Software suites are repairable if at least one of its applications is repairable. When a software suite gets repaired, PickMeApp repairs all repairable applications of the software suite. When you uninstall a software suite, PickMeApp uninstalls all related applications.
PickMeApp may fail to find all related applications for a particular software suite, thus losing some its features when transferred by PickMeApp. We constantly improve the PickMeApp abilities to recognize related applications. PickMeApp will only recognize Microsoft software suites as well as predefined custom suites. This limitation will be reduced in the following releases!
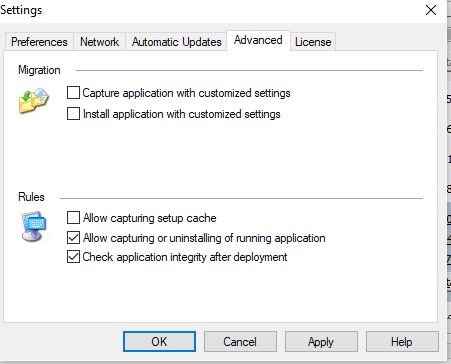
4.4 Capture Setup Cache
4.4 Capture Setup CacheTo allow smooth repair and install additional components and features, many software programs cache some installation files on the user’s PC during their first installation.
Since version 1.2, PickMeApp has been able to capture and transfer applications’ installation caches while capturing the applications. Along with the “Check integrity of installed applications” feature, this new function significantly improves application re-installation.
One drawback of the capturing setup cache feature is that the captured package has a larger size. Sometimes it may be twice the initial package size. Also, the capture may take longer time. Disable this feature if you need quicker capturing or a smaller installation package!