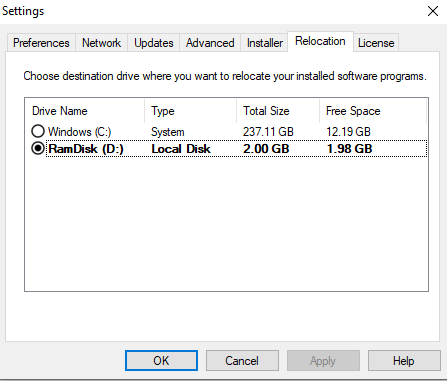
To enable the relocation feature, select a destination drive in the Relocation Tab of the Settings menu. The destination drive is used as the destination for relocated application files and folders.

The Relocation settings tab shows a sorted list of compatible drives available on the computer. The first drive on the list is the drive with the most available storage space. The drive that is currently chosen as the destination drive is show in bold.
The list does not include non-NTFS and removable drivers. No drive can be chosen if there is only one compatible drive available on the computer, and the relocation feature is disabled. A driver without free space cannot be chosen as a destination drive.
Note: The relocation feature is enabled on computers with two or more non-removable NTFS drivers.
Select the destination drive in the drive list and press the “Apply” or “OK” buttons to save your choice. From that point on, any new relocations are done on that destination drive. The PickMeApp Session log will then show the following message:
“Drive <name of drive><Disk Label:> was chosen as relocation destination.”
Note: If a destination driver was deleted, select a new destination drive to enable the relocation feature.